Proper pitching mechanics: 6 critical points
There are a number of ways to reduce the risk your child will suffer an injury pitching in youth baseball, such as proper conditioning, warm-up routine, and pitch limits, but my focus here is on the role proper biomechanics plays in injury prevention, and, more specifically, the six points that are critical to a good pitching motion:
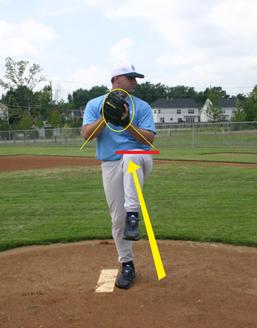
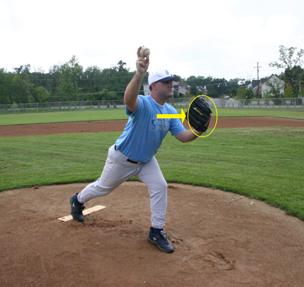
Critical point #1 (lifting stride leg): The first dynamic balance point begins as a pitcher lifts the stride leg. This is a recent change in philosophy. We used to teach pitchers that, to achieve a static balance point, they should "stop at the top." By that I mean, a slight pause at the balance point; similar to the position in the photo above. We now teach advanced pitchers a constant dynamic movement which is difficult to capture in a still photo.
If a pitcher is off balance at this point - by which I mean leaning in the direction of one of the three bases - the pitch location will most likely be a ball or at best will be a guess. The key teaching point: the bent leg and thigh up needs to be lifted to around 90 degrees from the body. Lower than 90 degrees may limit the motion, higher may throw off the balance.
For the moment let's put aside the slide step or other quick motions to the plate. But do remember this: if a pitcher is too quick to the plate because he is worried about a runner on first, and makes a bad pitch that the batter deposits off or over the outfield fence, few will care about how fast he was to the plate! A pitcher's number one priority when a man is on first is to make a good pitch (this is something that holds true at all levels of baseball, right up to the major leagues).
A right handed pitcher's knee should be pointing to third base (LHP to 1st base) and in front of the navel, directly below the glove. The hands should be in the same relaxed and comfortable position as if they were applauding. The body should be bent as if in a batting stance.
Critical
point #2 (timing): Timing begins here. What is timing? Like a row of dominos poised to fall, timing is the proper sequence of the orderly movement of body parts. It begins when the hands separate and ends when all body parts are in the proper position to release the ball. Most mistakes in timing - late or early - happen during the hand separation phase. Early timing will most likely cause the ball to go low. Late timing generally makes the ball stay high.
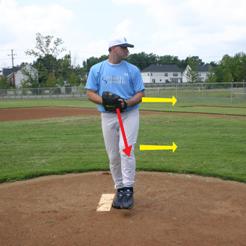
From the "pitching stance" (same or similar posture as if the player were batting) in the stretch position, the player pushes the hands down as if pushing down the thigh. The stride leg moves straight down and then out towards home plate. The leg must land on the ball of the foot in a straight line, slightly closed (5 to 25 degrees) to the plate.
The pitcher's arms separate at the same time and move in opposite directions to an equal and opposite relationship. Elbows are 90 degrees from the torso. [Note: Recent reports from the medical community (American Journal of Sports Medicine and the American Sports Medicine Institute), show that raising the elbow higher than 90 degrees leads to significant arm impingement and increased risk of arm injury requiring surgery].
This is new. The shoulders are in a straight line towards the plate. Do not move either shoulder from that line and continue to move your elbows back and pinch your shoulder blades together. Extend your arms as if you were going to hug someone not as if you were signaling a touchdown. This position, referred to as scapular loading, creates less superior rotator cuff muscle impingement, uses less energy and .... can make the ball go faster This is called the launch position.
Critical point #3 (power): Power, the kinetic chain, begins, when the stride foot lands on the slope of the mound. From that point energy flows in a constant direction (and hopefully a straight line) up the body. In many versions of the wind up, motion stops, then reverses its direction. The thought of developing more momentum in the wind up is silly when you think of how many re-directional changes a complicated wind up involves. This is why so many pitchers lose control (balance) early in the wind-up even before the ball leaves their hand! The chance for a timing problem dramatically increases as well.
Stride length is easy to fix. Lay a pitcher on his back, with his heels touching the front of the rubber and the head toward home and mark a line at the top of the shoulder. Typical stride length is 85% of height. That is the distance is measured from the front of the rubber to the tip of your landing foot shoe. Much the same as in pole vaulting, as the foot lands, power drives up the leg. Next the hips must fully rotate and open, prior to the shoulders. The navel should be pointing at the catcher's glove. This establishes torque. This is exactly the same power sequence as in hitting. Hip and shoulder separation are key to sustaining velocity late in the pitch count.
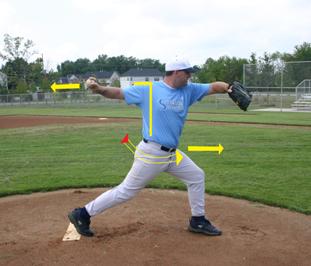
STOP HERE. STAND UP. Yes coach/parent, I mean you.
- Get in a launch positions as described in the previous two pictures. You must experience some of these positions (You have an incentive too: learning this will help you throw better batting practice!!).
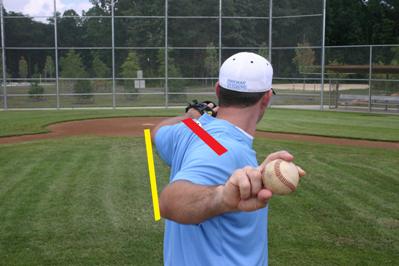
- Keep your throwing elbow in line with 2nd base and your glove elbow firmly fixed on home plate. Both shoulders should be in a direct line with the catcher's glove and second base.
- Turn your hips so your navel points to home. That stretch or burn is establishing torque or power that all good pitchers develop. Again, the same motion as in hitting! This hip and shoulder separation concept is also a key skill in golf. I believe they call it the X Factor and a good reason that so many ball players are good golfers.
By far the most common flaw relative to accurate throwing for any position including catcher, occurs in the graphic below, viewed from behind the pitcher; the best spot to discover balance issues. The right hand pitcher's back is bent, the head is also off center leaning toward first base and the hips are off center to the right. Subsequently the critical need for the eyes to remain level with the horizon fails. Level eyes are essential to establish depth perception (LHP is opposite). I've seen this flaw daily, for over 20 years.
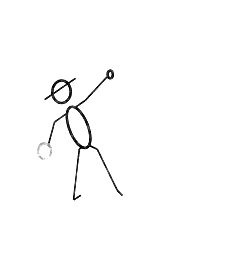
View from BEHIND the pitcher
Critical point #4 (elbow position): The arm throws the ball. The body creates a solid foundation, shares the load and facilitates endurance. ASMI debunked conventional wisdom over 10 years ago: Jumping or pushing off the mound will not make the ball go faster. It will likely disrupt timing and make the ball go slower.
As the hips turn and arm follows, the body has created the foundation for the arm to move as quickly and efficiently as possible with the least amount of stress. This develops endurance with velocity and substantially reduces the probability of repetitive motion injury.
As the arm passes to the side of the body, the elbow should be no lower than 90 degrees from the shoulder and torso. Too high or too low is very harmful, leading to pain and poor performance. It is absolutely essential that all throwers' eyes be level with the horizon and the nose directly out and over the stride leg knee. This is the way all people walk straight.
